Creative Curtain DIY Ideas: Easily Transform Your Space
Looking to transform your space with creative DIY curtain ideas? Look no further! At Dolcewe, we have gathered a variety of tutorials to help you easily create unique curtains without breaking the bank.
From no-sew options to adding trims and decorative details, there are plenty of ideas to inspire you. Whether you want to add color and texture with tassel curtains or stencil a design onto plain panels, these DIY projects will help you achieve the look you desire. You can even customize store-bought curtains by adding trim or fabric to elevate their style. Don't let the cost of curtains deter you from dressing up your windows - these tutorials will show you how to make stunning curtains that fit your budget.
So go ahead and get creative with your window treatments - the possibilities are endless!
Key Takeaways:
- Transform your space with creative DIY curtain ideas
- Easily create unique curtains without breaking the bank
- Explore no-sew options and decorative details
- Add color and texture with tassel curtains or stenciled designs
- Customize store-bought curtains to elevate their style
The Benefits of DIY Curtains
Why settle for store-bought,when you can create your own unique window treatments? DIY curtains allow us to unleash our creativity, customize our space, and save money in the process. Here are just some of the benefits of making your own curtains:
- Personalization: With DIY curtains, you can choose the fabric, color, pattern, and style that perfectly reflects your taste and decor. Plus, you can adjust the length and width to fit your specific window dimensions, ensuring a perfect fit.
- Creative expression: Making your own curtains allows you to experiment with different textures, techniques, and embellishments. From hand-painted designs to pom-pom trims, the possibilities are endless!
- Affordability: Store-bought curtains can be expensive, especially for custom sizes or designs. DIY curtains are often a budget-friendly alternative, allowing you to save money without sacrificing style.
- Endless possibilities : Whether you're looking to spruce up your home with elegant drapes, add privacy with blackout curtains, or create a cozy feel with pom-pom trimmed panels, making your own curtains allows you to choose from a wide range of styles and types.
- No Sewing skills Required: While some curtain projects require sewing skills, many DIY curtain ideas can be completed without any sewing. From no-sew privacy curtains to hand-painted designs, there's a curtain project for every skill level.

So, whether you're an experienced crafter or a novice DIY enthusiast, making your own curtains is a fun and rewarding project that can transform your space into a personalized oasis. Let's get started!
DIY curtains give you the opportunity to turn a basic necessity into a stylish statement piece. With their affordability, versatility, and ability to reflect your personality, these curtains will truly transform your space.
No-Sew Privacy Curtains
If you're looking for an easy and no-sew curtain solution, privacy curtains are a great option to consider. These curtains not only provide privacy but also add a touch of elegance to any room. The best part? You can create them without any sewing skills! Here, we will guide you through the process of making your own no-sew privacy curtains.
To make your curtains, you'll need a few basic materials:
- Fabric of your choice
- Fabric glue or fusible bonding tape
- Scissors
- Measuring tape or ruler
Start by measuring the length and width of your window and add a few inches to each measurement to allow for hemming. Check our curtain size guide and size calculator tool to find the perfect size.
Next, cut your fabric to the desired size. You can choose a solid color for a sleek look, or experiment with patterns and textures for a more eclectic style.
Once you have the fabric cut, it's time to create the hems. To do this without sewing, you can use fabric glue or fusible bonding tape. Fold the edges of the fabric over and apply the glue or bonding tape along the folded edges. Press the fabric together firmly to secure the hems. Repeat this process on all sides of the fabric.
Materials for No-Sew Privacy Curtains
| Materials | Quantity |
|---|---|
| Fabric | Depends on the size of your window |
| Fabric glue or fusible bonding tape | As needed |
| Scissors | 1 pair |
| Measuring tape or ruler | 1 |
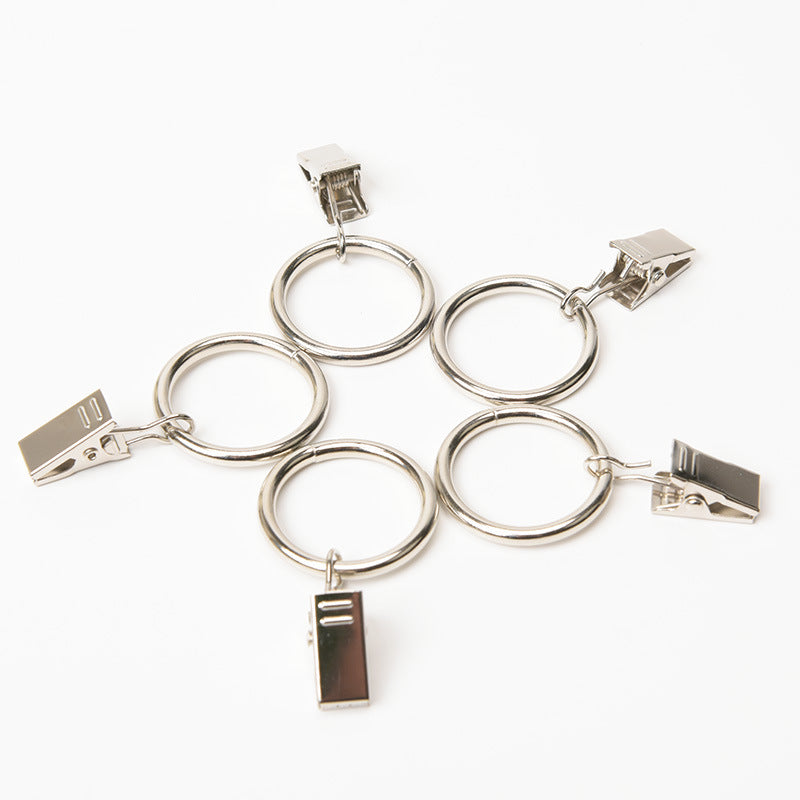
Once your hems are secured, hang your curtains using a curtain rod or tension rod. If you want to add a decorative touch, you can use clip-on curtain rings or hooks to hang your curtains. Alternatively, you can create a rod pocket by folding over the top edge and securing it with fabric glue or bonding tape.

With your no-sew privacy curtains, you can enjoy both style and functionality in your space. The best part is that you can easily customize them to fit your personal taste. Add trims, tassels, or tie-backs for a more decorative look. The possibilities are endless!
No-Sew Kitchen Towel Curtains
Give your kitchen a fresh look with these no-sew kitchen towel curtains that are both practical and stylish. These DIY curtains are a great way to add a pop of color and personality to your kitchen while also serving a functional purpose. Plus, since there's no sewing involved, they are super easy to make!
To create these adorable curtains, all you need are some kitchen towels, curtain clips, and a tension rod. Start by selecting your desired kitchen towels - you can mix and match patterns or stick to a cohesive theme. Lay the towels flat on a table and fold over the top edge about 2-3 inches. Use the curtain clips to secure the towels to the tension rod, spacing them evenly apart.
If you want to add some extra flair to your kitchen towel curtains, consider incorporating trims or decorative elements. You can attach pom-pom trim, embroidered patches, or even fabric flowers to enhance the visual appeal. Get creative and customize your curtains to match your kitchen's aesthetic!
Materials you'll need:
| Materials | Quantity |
|---|---|
| Kitchen towels | 2-4 |
| Curtain clips | 6-8 |
| Tension rod | 1 |
| Optional trims/decorative elements | As desired |

With these no-sew kitchen towel curtains, you can transform your kitchen into a vibrant and stylish space without spending a fortune. So why wait? Grab your supplies and let your creativity flow!
Stenciled Curtains
Elevate your curtains to a whole new level with stenciled designs that add a touch of personality and style to any room. Stenciling is a simple yet effective technique that allows you to create intricate patterns and designs on plain curtains. Whether you prefer bold geometric shapes or delicate floral motifs, stenciled curtains can make a statement and become a focal point in your space
Creating stenciled curtains is a fun and rewarding DIY project. Here's how you can get started:
- Choose a stencil design that complements your decor. You can find a wide variety of stencils in craft stores or online, or you can even create your own using stencil blanks and a craft knife.
- Prepare your curtains by washing and ironing them to ensure a smooth surface.
- Place the stencil on the curtain and secure it in place with painter's tape.
- Using a foam brush or stencil brush, dab the paint onto the fabric within the stencil openings. Start with a light coat and gradually build up the color to achieve the desired effect.
- Once the paint is dry, carefully remove the stencil to reveal your stenciled design.
If you're feeling adventurous, you can experiment with different colors, layering techniques, or even combine multiple stencils to create a unique and personalized look. 
Stenciled curtains can be used in any room of the house, from the living room to the bedroom, and they can instantly transform the atmosphere of a space. So unleash your creativity and let your curtains become a reflection of your style and taste!
Blackout Curtains
Say goodbye to unwanted light and hello to a good night's sleep with DIY blackout curtains. These curtains are a great solution for those who want to block out light and create a cozy and restful atmosphere in their space.
| Materials: | Tools: |
|---|---|
| - Curtain panel | - Measuring tape |
| - Blackout fabric | - Pins |
| - Thread | - Sewing machine or needle and thread |
| - Scissors | - Curtain rod or hooks |
With a few simple steps, you can make your own blackout curtains and enjoy the benefits of a darkened room.
- To create DIY blackout curtains, start with a basic curtain panel in the fabric of your choice.
- Measure the width and length of your window and add a few inches for seam allowances.
- Next, line the back side of the curtain panel with blackout fabric. This fabric is specially designed to block out light and is available at most fabric stores. Cut the blackout fabric to the same size as your curtain panel and pin it in place.
- Once the blackout fabric is pinned to the curtain panel, sew around the edges to secure it in place. Be sure to sew close to the edge to prevent light from seeping through. You can use a sewing machine or hand sew the panels together, depending on your preference and skill level.
- Once the panels are sewn together, hang your DIY blackout curtains and enjoy a dark and peaceful space.
With DIY blackout curtains, you can create a serene and peaceful environment in any room. These curtains are not only functional but also add a touch of elegance to your space.
So why settle for ordinary curtains when you can make your own blackout curtains and enjoy a good night's sleep?
Polka Dot Curtains
Polka dot curtains are a fantastic choice if you want to add a touch of whimsy to your living space or decorate a child's room. They bring a pop of color and visual interest to any room, creating a cheerful and vibrant atmosphere.
Creating your own polka dot curtains is easier than you might think. Here's what you'll need:
- Plain curtains
- Fabric paint
- Round sponge or stencil brush
Follow these simple steps to create your own polka dot curtains:
- Lay your curtains flat on a protected surface.
- Dip your sponge or brush into the fabric paint and gently press it onto the curtains to create polka dots.
- You can make the dots uniform in size or vary the sizes for a more playful look.
- Experiment with different colors to match your existing decor or add a bold contrast.
For a more precise and professional finish, you can also use stencils. Here's how:
- Secure the stencil to the curtain.
- Apply the fabric paint with a brush or sponge.
- This method ensures that each dot is perfectly shaped and evenly spaced.
With these simple steps, you can add a touch of fun and playfulness to your windows with DIY polka dot curtains.
| Materials: | Instructions: |
|---|---|
| Plain curtains | 1. Lay the curtains flat on a protected surface. |
| Fabric paint | 2. Dip the sponge or brush into the fabric paint. |
| Round sponge or stencil brush | 3. Gently press the sponge or brush onto the curtains to create polka dots. |
| Stencil (optional) | 4. Use stencils for a more precise and professional finish. |
Polka dot curtains are a perfect DIY project for anyone looking to add a touch of fun and playfulness to their windows.
They are a great way to express your creativity and personalize your space. So why wait? Grab your supplies and start transforming your room with these delightful DIY curtains today!
Burlap Curtains
Burlap is a versatile and affordable fabric that adds texture and warmth to any room. With just a few simple steps, you can create stunning curtains that exude charm and character. Let's explore some creative ideas and techniques to help you transform your space with burlap curtains.
Materials You'll Need
- Burlap fabric
- Curtain rod
- Iron-on hem tape
- Trims and embellishments (optional)
- Measuring tape
- Scissors
- Sewing machine (optional)
Step 1: Measure and Cut
Start by measuring your windows to determine the length and width of your curtains. Add a few extra inches to the measurements for hems and desired curtain fullness. Then, cut the burlap fabric according to your measurements.
Step 2: Hem the Edges
To prevent fraying, use iron-on hem tape to create neat and sturdy hems on all sides of the fabric. Simply fold the fabric over, place the hem tape between the layers, and apply heat with an iron. Alternatively, you can sew the hems using a sewing machine for a more secure finish.
Step 3: Add Personal Touches
Now comes the fun part – adding personal touches to your burlap curtains. You can glue or sew on trims, embellishments, or ribbon along the edges for a decorative touch. Consider adding pom-pom trims for a playful look or lace trims for a romantic touch. Get creative and let your unique style shine through!
With these simple steps, you can embrace a rustic and cozy vibe in your space with DIY burlap curtains.

With these DIY burlap curtains, you can bring a touch of rustic elegance to your space. Whether you're looking to create a cozy farmhouse vibe or add a natural element to your home, burlap curtains are the perfect choice.
So roll up your sleeves, gather your materials, and get ready to transform your windows into stunning focal points with these beautiful DIY burlap curtains!
Boho-Chic Macrame Curtains
Macrame, a technique of knotting cords into intricate patterns, has gained popularity in recent years for its bohemian aesthetic. Macrame curtains can instantly transform any room, adding texture, warmth, and a sense of natural beauty. Plus, creating your own macrame curtains allows you to customize the design and size to perfectly suit your space.
Supplies You'll Need
- Thick cotton rope or macrame cord
- Curtain rod or dowel
Step 1: Measure and Plan
Decide on the desired length and width of your curtains. Measure the space where you plan to hang them and add a few extra inches for the knots and fringe.
Step 2: Learn Basic Knots
Familiarize yourself with basic macrame knots such as the square knot, half square knot, and double half hitch knot. These fundamental knots will form the foundation of your macrame design.
Step 3: Create Your Macrame Curtains
Start creating your macrame curtains using the knots you've learned. You can choose to create a simple pattern using just one type of knot, or you can experiment with different knot combinations to achieve a more intricate design. Consider adding layers or incorporating beads or feathers for additional visual interest.

As you work on your macrame curtains, take your time and enjoy the process. Macrame is a meditative craft that requires patience and precision. Each knot you tie brings you closer to a stunning finished product that will add a unique touch to your space.
With these simple steps, you can bring a touch of boho-chic elegance to your windows with DIY macrame curtains. Thick cotton rope or macrame cord is typically used to create the intricate knots, and you can find these materials at craft stores or online. So gather your supplies, find a relaxing spot, and let your creativity flow as you craft your very own macrame curtains.
Cottage-Style Ticking Stripe Curtains
Cottage-style ticking stripe curtains are a perfect addition to any farmhouse or cottage-inspired decor, bringing a touch of rustic charm to your space. Fortunately, you don't have to spend a fortune to achieve this timeless look. With a few simple steps and materials, you can make your own cottage-style ticking stripe curtains that perfectly suit your style and budget.
Materials You'll Need
- Plain white or cream curtains
- Ticking stripe fabric
- Scissors
- Sewing machine
- Matching thread
Ticking stripe fabric is a durable and versatile option that adds a vintage touch to your curtains. You can find it at most fabric stores or online.
Step 1: Measure and Cut
Begin by measuring your windows and determining the length and width of your curtains. Cut the ticking stripe fabric into strips that are twice as wide as you want the stripes to be, allowing for a seam allowance.
Step 2: Sew the Strips Together
Sew the strips together, alternating the placement of the stripe pattern to create a classic ticking stripe effect.
Step 3: Attach the Ticking Stripe Fabric to the Curtains
Lay the ticking stripe fabric on top of the plain curtains, aligning the edges. Pin the fabric in place and sew along the edges to secure it to the curtains. Trim any excess fabric for a neat finish.
Hang your newly created cottage-style ticking stripe curtains and enjoy the cozy atmosphere they bring to your space!
With these simple steps, you can create a cozy and inviting atmosphere with DIY cottage-style ticking stripe curtains. Plain white or cream curtains, ticking stripe fabric, scissors, a sewing machine, and matching thread are all you need for this project. So gather your materials, get creative, and enjoy the process of making your own charming curtains.

With these easy steps, you can create beautiful cottage-style ticking stripe curtains that add warmth and character to your home. Remember to choose a ticking stripe fabric that complements your existing decor and select curtains of the appropriate length for your windows.
Once your curtains are complete, you can pair them with simple blinds or let them stand alone for a charming and timeless window treatment. So unleash your creativity and transform your space with these DIY cottage-style ticking stripe curtains!
Faux Roman Shade
Achieve the elegance of a Roman shade without the complexity with this DIY faux Roman shade tutorial. With just a few simple steps, you can create a beautiful window treatment that adds a touch of sophistication to any room.
To begin, gather the materials you will need:
- Fabric of your choice
- Iron-on adhesive
- Scissors
- Measuring tape
- Curtain rod or tension rod
Start by measuring the width and length of your window to determine the size of fabric you will need. Add a few extra inches to account for hemming and attaching the shade to the rod.
Next, cut your fabric to size and fold over the edges to create a clean and finished look. Secure the edges with iron-on adhesive, following the manufacturer's instructions.
Once the fabric is hemmed, fold it in accordion-style folds, creating the pleats. Use small pieces of adhesive to hold the pleats in place. Attach the shade to your curtain rod or tension rod, and voila - you have a gorgeous faux Roman shade!
Striped Curtain
Learn how to make stunning striped curtains with our easy-to-follow DIY tutorial. Transform your space with this simple yet elegant curtain design. Stripes are a versatile pattern that can add a touch of sophistication or playfulness to any room.
To create your own striped curtains, follow these step-by-step instructions:
- Start by measuring your windows to determine the length and width of fabric needed. Add a few extra inches to account for hems and seams.
- Select your fabric colors to create the striped pattern. Choose complementary or contrasting colors, depending on the look you want to achieve.
- Cut the fabric into long strips, ensuring they are all the same width. The width of the stripes is up to you, but be consistent throughout the curtain panels.
- Begin sewing the fabric strips together, alternating between the different colors to create the striped pattern. Use a sewing machine or hand stitch the strips together, making sure to align the edges properly.
- Once the fabric strips are sewn together, press the seams open to create a smooth surface.
- Cut out the curtain panels according to your window measurements, leaving extra fabric for hems.
- Turn the edges of the fabric under and hem them using a sewing machine or a simple hand stitch.
- Hang your striped curtains using curtain rods or clips, and adjust the length as necessary.
With this easy tutorial, you can have professional-looking striped curtains in no time. Experiment with different colors and stripe widths to create a custom look that matches your style and decor. Feel free to add trims or tassels to further enhance the design.
| Benefits of our Striped Curtain Tutorial: | What You'll Need: |
|---|---|
|
|
So why settle for plain curtains when you can make your own stunning striped curtains? This tutorial gives you the freedom to express your style and create a one-of-a-kind window treatment. Get started today and see the transformation unfold in your space!
Conclusion
With these curtain DIY ideas, you have the power to transform your space and add a personalized touch without breaking the bank. Let your creativity soar and create curtains that truly reflect your style and personality.
Looking to add color and texture? Try making tassel curtains or stenciling a design onto plain panels. Want a rustic touch? Consider burlap curtains or cottage-style ticking stripe curtains. From no-sew options to adding trims and decorative details, there are plenty of ideas to inspire you.
Don't let the cost of curtains deter you from dressing up your windows. These tutorials will show you how to make stunning curtains that fit your budget. You can even customize curtains by adding trim or fabric to elevate their style.
So go ahead and get creative with your window treatments. With these curtain DIY ideas, you can transform your space and make it truly your own. Let your imagination run wild and enjoy the process of creating curtains that are as unique as you are!
FAQ
What are the benefits of DIY curtains?
DIY curtains are affordable and provide a unique and personalized touch to your space. By making your own curtains, you can achieve the exact look you desire without breaking the bank.
Can I create privacy curtains without sewing?
Absolutely! There are plenty of no-sew options for creating privacy curtains. We will provide step-by-step instructions on how to create privacy curtains without the need for sewing.
How can I transform kitchen towels into curtains?
No-sew kitchen towel curtains are a great option for adding charm to your kitchen. We will guide you through the process of transforming ordinary kitchen towels into stylish and functional curtains.
How can I add patterns to plain curtains?
Stenciling is a creative DIY option for adding patterns and designs to plain curtains. We will explain the process of using stencils to customize your window treatments.
Are blackout curtains practical and can I make them myself?
Blackout curtains are not only practical for creating a restful and darkened space, but you can also make them yourself. We will provide instructions on how to make blackout curtains using affordable materials.
How can I create polka dot curtains?
Adding polka dot patterns to plain curtains is a fun and whimsical DIY project. We will provide inspiration and step-by-step instructions on how to create polka dot curtains.
What can I do with burlap fabric to create unique curtains?
Burlap curtains are perfect for adding rustic charm to your space. We will provide tips and techniques for working with burlap fabric and creating stylish curtains.
How can I achieve a boho-chic look with macrame curtains?
Macrame curtains are a trendy choice for achieving a boho-chic look. We will provide step-by-step instructions on macrame knots and patterns to help you create your own macrame curtains.
How can I create cottage-style ticking stripe curtains?
Cottage-style ticking stripe curtains add a timeless charm to any room. We will guide you through the process of creating these classic curtains to bring a touch of farmhouse style to your space.
What is a faux Roman shade and how can I make one?
A faux Roman shade is a unique DIY curtain idea that creates the illusion of a Roman shade using fabric and basic sewing techniques. We will provide instructions on how to make your own faux Roman shade.
Can I create striped curtains and how?
Absolutely! We will provide a step-by-step tutorial on how to create striped curtains. From measuring to cutting and sewing, we will guide you through the process to achieve stylish striped curtains.
What are some affordable DIY curtain options to transform my space?
DIY curtains are a budget-friendly way to transform your space. Whether it's using no-sew techniques, stenciling, or adding decorative details, there are plenty of affordable DIY options to personalize your window treatments.


